Saturday, May 16, 2015

Coconut Vanilla Lip Balm with Beeswax and Honey

Here is the Coconut Vanilla Lip Balm recipe that I showed at Maker Faire!

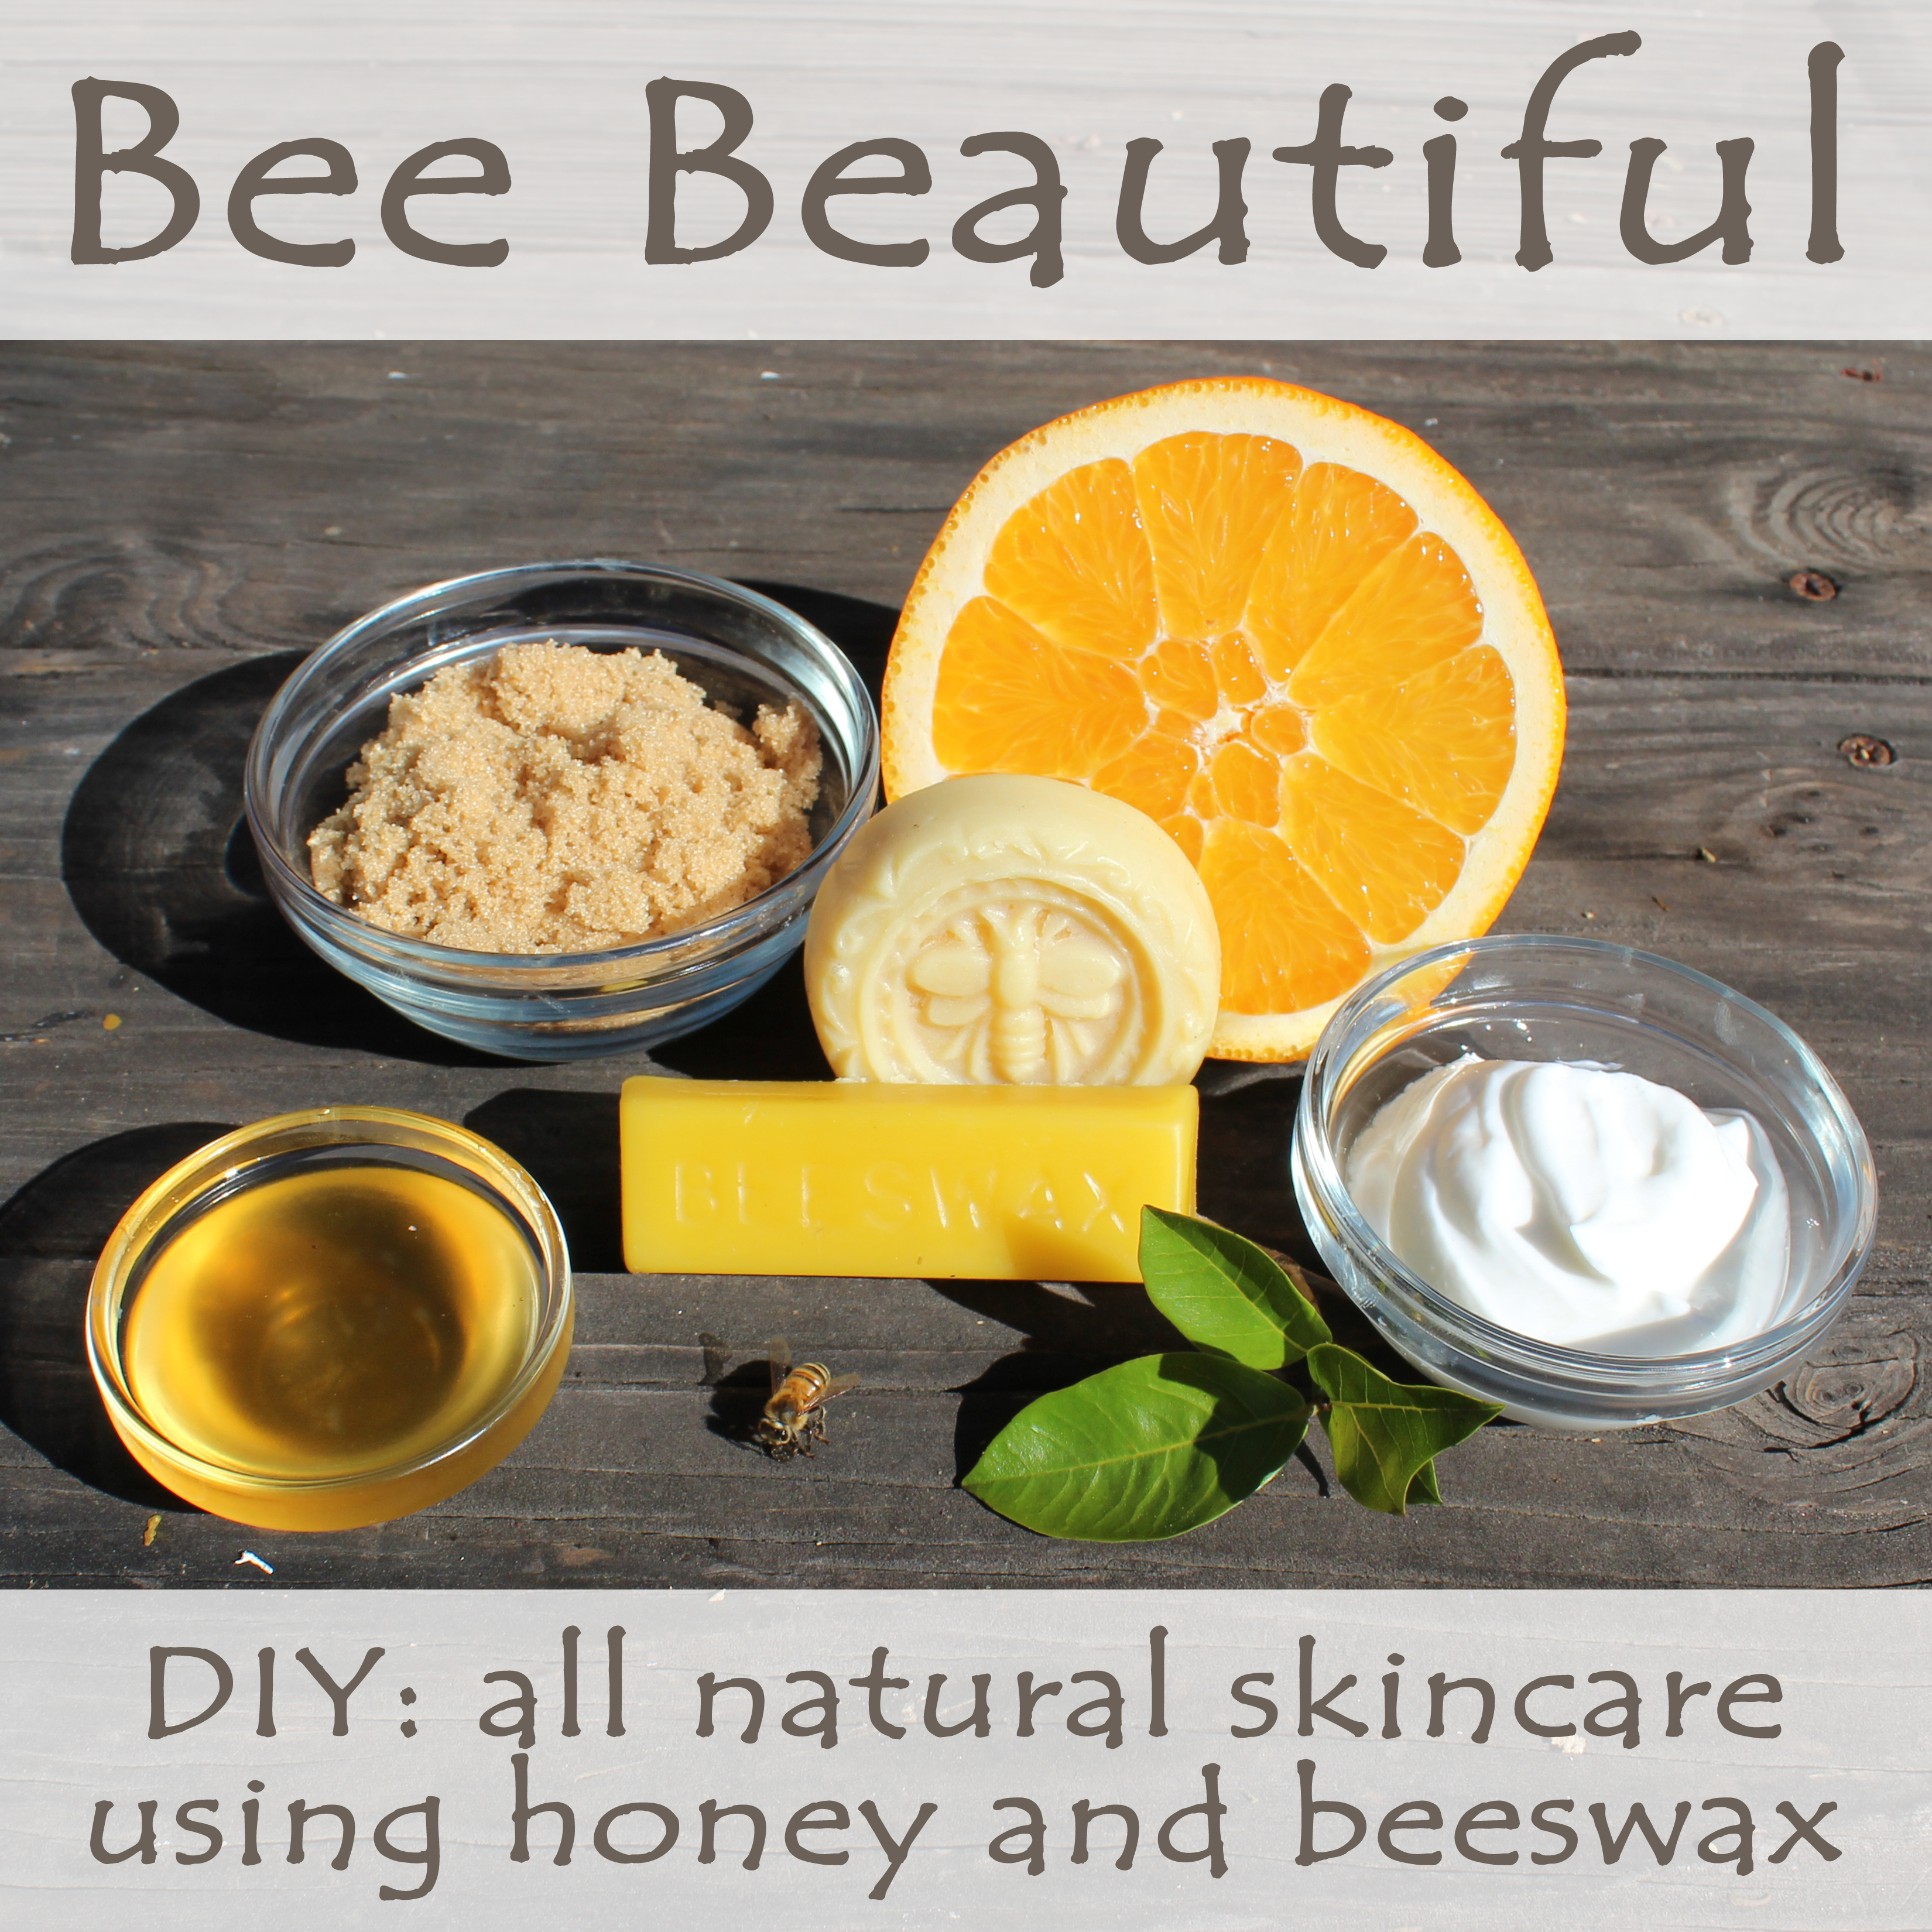
This is a great base lip balm to get started with. The coconut and honey are moisturizers, and if you use unscented coconut oil, it is easy to add your own unique lip balm scent!

Ingredients

  • 1/2 Ounce Beeswax. Pearls will melt the fastest, but you can also use bricks.
  • 3 Tablespoons Coconut Oil or any other Carrier Oil you wish.
  • 1 Teaspoon Honey
  • 1/4 Teaspoon Organic Vanilla Extract**
* Coconut oil can be substituted for most other oils: sunflower oil, olive oil, or almond oil. I like the coconut oil the best because the result is very moisturizing.

** Vanilla extract is a very fool-proof scent (along with the scented coconut oil). To use a different scent, use an unscented coconut oil and remove the vanilla extract. Instead, add 3-5 drops of essential oil. USE CAUTION WHEN ADDING ESSENTIAL OILS - please research the side effects of essential oils prior to adding them to your lip balm. Some essential oils may cause sun or skin sensitivity.

Equipment


  • Saucepan for boiling water. I use a 8" saucepan.
  • Metal mixing bowl, preferably an older one that you don't care about or one from the dollar store. The bowl should be able to rest on the rim of the pot without touching the bottom.
  • Whisk, again preferably an older one that you don't care about or one from the dollar store.
  • 10 Lip Balm Tubes
  • 1 or 2 Pipettes - you can avoid using these if you use lip balm pots instead of tubes. It's tricky to pour lip balm into the tubes, the pipettes make it cleaner.

Storage & Shelf Life

This lip balm will last for over a year - or at least that is the longest that I've had one so far. Usually I use them much more quickly than that :)

Make it!

  1. Fill your pot with with about 1" of water. Heat it to just below a simmer, this is very low heat. The water should be producing steam. Place the bowl on top of the pot to create a double boiler. This will gently heat your ingredients. 
  2. Place the wax in the bowl and melt it completely before adding additional ingredients.
  3. Add the carrier oil. Since the oil is cool, it may solidify some of the wax temporarily. Whisk the mixture to dissolve the ingredients to a liquid again.
  4. Add the honey and remove the bowl from the heat. 
  5. Now is a good time to set up your lip balm tubes. Remove the caps and place 10 lip balm tubes upright near your bowl of melted ingredients. 
  6. Now go back to your bowl and mix. The liquid should slowly start to cool until it is creamy. Allowing the liquid to cool like this will help keep your honey in suspension. If the liquid becomes too hot, the honey will sink to the bottom of the bowl, and the bottom of your lip balm tubes. 
  7. Add your scent, in this case, the vanilla extract. Whisk until smooth.
  8. Put your bowl back onto the heat. Whisk until the liquid just barely becomes a liquid again. You want to heat the lip balm as little as possible at this point because excess heat will cause your scent to degrade.
  9. Use the pipette to transfer the lip balm into the tubes. If the liquid is too cool, it will solidify in the pipette as you try to transfer it to the tubes. This is why it is good to have a backup pipette, just in case. Fill the tubes right up to the top. It's ok if they bulge a little, the wax will shrink slightly as it cools and the surface will sink down.
  10. Allow to cool for at least 10 minutes before capping, and cool for at least an hour before use. 
  11. Now you can add on labels and enjoy :) You can find many printable labels on Amazon. I personally like the Clear Gloss Inkjet Lip Balm Labels from Online Labels the best - that way you can see how pretty the color of the beeswax is instead of covering it all up!

This is the lip balm recipe that I use for my Coconut Vanilla flavor. Check out some of my other lip balms in my new online store!

Honey Oatmeal Face Mask

Here is the Honey Oatmeal Face Mask recipe that I showed at Maker Faire!

This mask is an excellent cleanser for sensitive skin. Honey, yogurt and orange juice all have properties that will help clear skin discoloration. Oatmeal is a gentle cleanser while the citric acid in the orange juice will help tighten pores. The lactic acid found in yogurt is also a common ingredient of many facial peels, it will help remove dead skin cells to leave your face looking more radiant. Honey contributes as a moisturizer, brightener, and cleanser.


Ingredients

  • 1/4 Cup Instant Oatmeal
  • 2 Tablespoons Orange Juice
  • 1 Tablespoon Honey
  • 1 Tablespoon Yogurt
Storage & Shelf Life

I like to use this mask immediately, but it will last refrigerated for up to a week. It can also be nice to use it cold out of the fridge, it's very refreshing!

Make it!

  1.  I like to use instant oatmeal for this recipe because it will hydrate more quickly. Run the oatmeal through a blender for 10-15 seconds to ensure that your mask has a smooth consistency. The oatmeal will look like more of a powder now, but it will still have a little bit of texture. Below, you can see the difference between the unprocessed oatmeal (Left) and the blended oatmeal (Right).
  2. Now that the oatmeal is blended into a powder, this one is another easy one! Just put all of the ingredients into a bowl and stir it up until it is a consistent color and texture.
  3. Wait 5 to 10 minutes for the oatmeal to fully hydrate. The texture you are looking for is a smooth wet paste. The mask is too thick if you cannot spread it smoothly on your skin and it clumps together. The mask is too thin if it drips right off - it should be able to stick to your skin without sliding off.
  4. To use, apply the entire mixture to your skin, avoiding the eyes, nostrils and mouth. Leave on for 15 to 20 minutes then rinse with warm water.


Learn More

There are plenty of articles online about the health benefits of the ingredients. Here are just a few that go into more depth than I do in my post:
  • Learn more about the benefits of Honey.
  • Learn more about the benefits of Oatmeal.
  • Learn more about the benefits of Yogurt.

Honey Sugar Scrub

Here is the Honey Sugar Scrub recipe that I'll be showing at 4:30PM today at Maker Faire!

This scrub is a great exfoliator and  mosturizer. The three ingredients in this scrub (brown sugar, coconut oil, and honey) all have mosturizing properties. Brown sugar is a fantastic exfoliator for sensitive skin because it has smaller particles than salts and other sugars.


Ingredients

  • 1/4 Cup Brown Sugar
  • 2 Tablespoons Coconut Oil
  • 2 Tablespoons Honey
Storage & Shelf Life

This scrub should last un-refrigerated for at least 6 months. Coconut oil becomes a liquid instead of a solid above 76 degrees Fahrenheit, so it may separate from the brown sugar and honey. No problem! Just stir it back up!

Make it!

  1.  This one is an easy one! Just put all of the ingredients into a bowl and stir it up until it is a consistent color and texture.
  2. To use, just take a small scoop and rub it onto your skin. Rinse off the excess with warm water. I like to use it on my feet and legs - but it is gentle enough to use even on your face.


Learn More

There are plenty of articles online about the health benefits of the ingredients. Here are just a few that go into more depth than I do in my post:

Friday, May 15, 2015

Bay Area Maker Faire 2015

Bay Area Maker Faire is coming this weekend! I've been accepted to do two talks: Backyard Beekeeping and Bee Beautiful. Both talks are on Saturday, May 16th. Backyard Beekeeping starts at 1:00PM and Bee Beautiful is at 4:30PM - Come check it out!


I did the Backyard Beekeeping talk last year - it's a 30 minute primer to help people assess whether they would like to start beekeeping. It's also a great talk for just general knowledge about bees.


Bee Beautiful is a new talk for this year. I'm going to do a 30 minute live demonstration of how to make lip balm, a face mask, and a body scrub. All of them will have honey in them and the lip balm contains beeswax too :)

I'll be posting the recipes for the beauty products on Saturday if you want to try them at home.