
Thursday, November 29, 2012
Honey Label: Hometown Honey!

Wednesday, October 10, 2012
Recipe: Lemon Honey Macaroons
I gave a bottle of the August Harvest honey to my friend, Psy, and here is the recipe she came up with. These were soooo delicious!
Lemon Honey Macaroons
Photo Credit: Kendal Sager
Recipe Credit: Psy Delacy
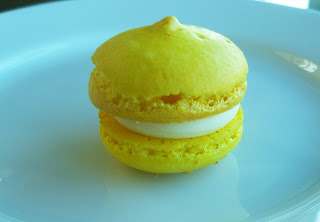
Lemon Shells
Ingredients:
Whipped Lemon Honey White Chocolate Ganache:
Ingredients:
Lemon Honey Macaroons
Photo Credit: Kendal Sager
Recipe Credit: Psy Delacy
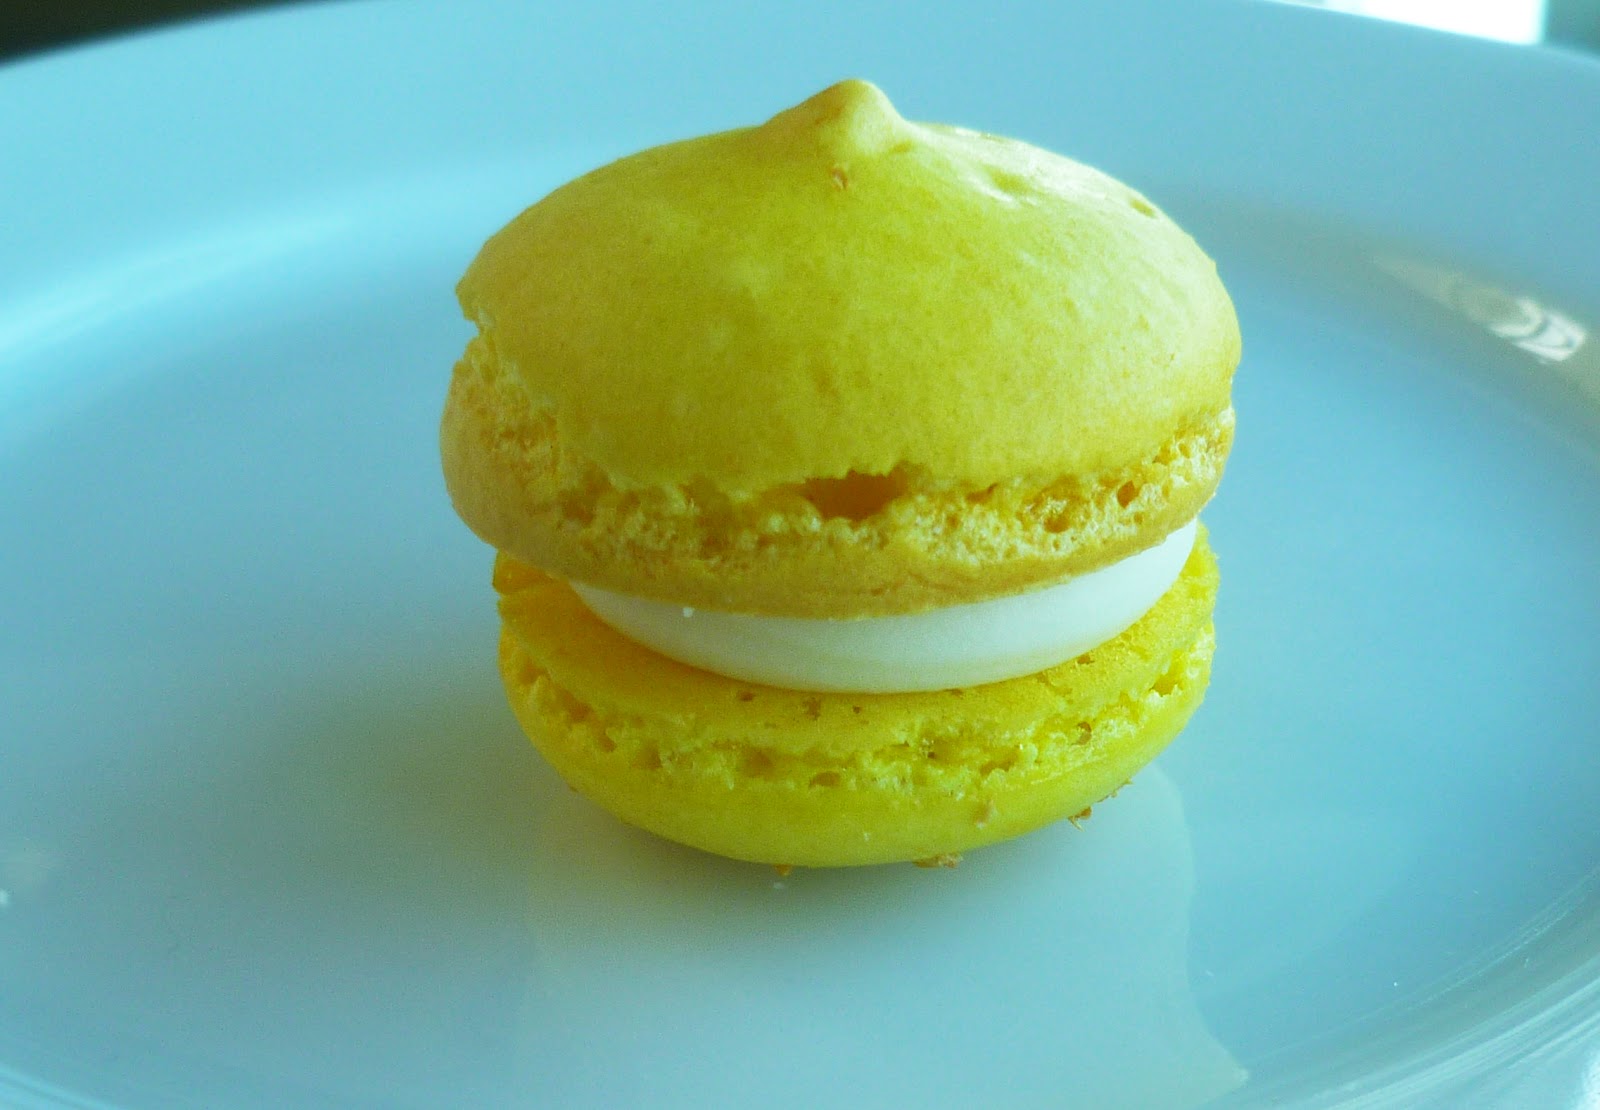
Makes 30-50 cookies depending on shell size
Lemon Shells
Ingredients:
- 4 egg whites, separated when cold, then aged, covered, for 24 hours.
- 1/4 teaspoon cream of tartar
- 1/4 cup superfine granulated sugar
- 1 teaspoon vanilla extract (or for an even more lemony shell, 1/2 tsp
- vanilla extract and 1/2 tsp lemon extract)
- 2 cups powdered sugar
- 1 cup almond meal
- Yellow gel food coloring, if desired
- Lemon zest, lemon sugar or fairy dust (optional)
- For the egg whites: they separate better when cold, so separate them, cover lightly with saran wrap, and leave on the counter for at least 24 hours.
- Preheat the oven to 325F. Line an aluminum or otherwise light colored baking sheet with silpat.
- Grind the almond meal in a food processor for about 10-15 seconds to break up any larger chunks. Sift together the almond meal and powdered sugar, and set aside.
- Whisk or beat the egg whites and cream of tartar on medium-high until soft peaks form. Slowly add the granulated sugar, and continue to whisk on medium-high until stiff peaks start to form. Add the extract and food coloring, and then continue to beat until you have a glossy, stuff meringue.
- Fold in the powdered sugar/almond mixture carefully, as to not deflate the meringue. Mix until just incorporated, and then mix gently until you notice that if you lift up the spatula and let the batter flow back into the bowl, the "ribbons" that form disappear in about 10-18 seconds.
- Add the mixture into a pastry bag with a #11 or #12 type round tip. To pipe it onto the silpat, hold the bag over the silpat so that the nozzle is about a centimeter above the silpat, and squeeze so that the batter comes out of the pastry bag nozzle and spreads itself out until it's about the size of a quarter to a half dollar, depending on how big you want your macarons. Space them about an inch apart on the silpat - they don't bake well if they are crowded.
- Once an entire sheet is piped, take the entire cookie sheet and whack it on the counter a few times to get any air bubbles out.
- Lightly dust the piped shells with lemon zest or sugar, if desired.
- Let the shells rest for about 15-30 minutes, depending on humidity. If you can, pipe the second batch as soon as the first goes into the oven, so that they will be ready when the first batch comes out. Only cook one batch at a time, otherwise they won't cook well.
- Bake the cookies for 13-15 minutes, or until just barely golden on the bottom.
- Let them cool on the sheet for 5-10 minutes before moving them. To get them off of the silpat, gently peel the silpat out from underneath them. The bottoms should be flat, and they should peel off easily.
- If you did not opt for lemon zest or lemon sugar, once the shells cool they can be dusted with fairy dust using a small foodsafe paintbrush. Edible fairy dust can be found at most kitchen or baking supply stores, and it's completely safe to eat.
Whipped Lemon Honey White Chocolate Ganache:
Ingredients:
- 1 bag of white chocolate chips or baking chocolate (about 12 oz), plus
- extra if needed
- Juice from 1 lemon
- 1/8th cup honey (or more, to taste)
- 1/2 cup heavy cream
- Juice the lemon and remove any seed pieces. Set aside.
- Combine the white chocolate and honey in a heat safe bowl.
- Heat the heavy cream over medium heat, stirring often. Once it's just about to boil, pour it over the chocolate chip honey mixture and whisk until the chocolate is melted.
- Add the lemon juice and stir until combined. The mixture should be thick and syrupy - if it seems too thin, you can add more white chocolate to thicken it. Be sure to taste it as well - if needed, add more honey or lemon juice.
- Refrigerate for a few hours until completely cool. It should thicken considerably in this time.
- Whisk the mixture on high to developed the whipped white chocolate ganache. Once it is light and fluffy, pipe it onto half of the macaroon shells using a pastry bag.
- Cover and refrigerate the complete macaroons overnight so that the flavors meld properly, and bring to room temperature prior to serving. If refrigerated they will last up to a week (if they don't all immediately get eaten).
Wednesday, September 19, 2012
School Talk
I recently visited a local preschool to talk about bee life cycles and how we get various products from bees. This was an awesome experience - the kids were actually really engaged. I was really surprised at some of the questions that they asked, they must have been briefed :) They were asking how bees communicated and what they do in the winter to keep warm.

I'm glad I brought so much of my equipment because that seemed to be their favorite part. They really liked squishing up beeswax, and of course they loved tasting the honey at the end.


I'm glad I brought so much of my equipment because that seemed to be their favorite part. They really liked squishing up beeswax, and of course they loved tasting the honey at the end.

Saturday, September 15, 2012
Recipe: Honey Whipped Cream
Mom loved the honey cook-off idea, so she whipped up a few recipes of her own. Here is our favorite so far:
Honey Whipped Cream
Photo Credit: Kendal Sager
Recipe Credit: Paula Sager

Ingredients:
Honey Whipped Cream
Photo Credit: Kendal Sager
Recipe Credit: Paula Sager

Ingredients:
- 2 tbsp honey
- 1 cup whipping cream
- In a large bowl, whip cream until peaks form.
- Whip in honey (sugar is typically used instead). If you use a flavorful honey, the taste should come across nicely.
- Serve with fresh fruit (shown above in a puff pastry bowl)
Free standing comb
After the last honey harvest, I threw all of the honey supers back onto the hives. I wanted to pull them back off for winter to reduce the hive size, but when I went to check on the bees today, they were already refilling all of the comb. There were way too many bees to take away the supers, so I just left them there.
Another surprise when I peaked in, I had forgotten to replace the foundation on one of the frames, but the bees just started filling it right up with comb:

I'd like to do more of my frames this way next year, rather than starting the bees off with plastic foundation. This way I might be able to harvest some honey comb next year. I ended up pulling this frame out of the hive temporarily so that I could show it to the class that I am teaching next week. This will be a great way to show kids how bees naturally draw comb.
Another surprise when I peaked in, I had forgotten to replace the foundation on one of the frames, but the bees just started filling it right up with comb:

I'd like to do more of my frames this way next year, rather than starting the bees off with plastic foundation. This way I might be able to harvest some honey comb next year. I ended up pulling this frame out of the hive temporarily so that I could show it to the class that I am teaching next week. This will be a great way to show kids how bees naturally draw comb.
Sunday, September 9, 2012
Honey Cook-Off
A few friends and I decided to do a honey cook-off with some of my latest harvest. We did it Iron Chef style with the theme ingredient of HONEY!
Below are some of the dishes I came up with. If you find any amazing honey recipes, please comment with a link :)
Sweet and Salty Bruschetta
Photo Credit and Recipe Credit: Kendal Sager

Ingredients:
Recipe Credit: Food.com recipe modified by Kendal Sager

Ingredients:
Honey Garlic Sauce:
Recipe Credit: Idea from Giada (Cooking Channel) recipe created by Kendal Sager

Ingredients:
The Paste:
Below are some of the dishes I came up with. If you find any amazing honey recipes, please comment with a link :)
Sweet and Salty Bruschetta
Photo Credit and Recipe Credit: Kendal Sager

Ingredients:
- 2 tbsp honey
- 1 baguette
- goat cheese (firm is better, I used Drunken Goat Cheese)
- 1 granny smith apple
- 1 pack pancetta
- 1/2 cup chopped walnuts
- Thinly slice your baguette, it looks best when you slice on a diagonal (rather than cutting perpendicular to the length of the bread, cut at a 45 degree angle to increase the surface area)
- Lay out all of your bread slices on a baking sheet
- Place a small slice of cheese on each slice of bread.
- Slice up your apple into small flat slices (not wedges), place one on each slice of bread.
- Crumple up a slice of Pancetta and balance it on top of your bread/cheese/apple
- Balance some chopped walnuts on top.
- Put the baking sheet in the oven and set the oven to broil. Keep the pan under the broiler until you start to see the bread turn a nice golden brown color, this will happen in only a few minutes. Keep your eyes on the bread as it is cooking, there is a very small window of time between "perfect" and "everything is ruined and my kitchen is filled with smoke".
- Place a piece of bruschetta on a plate and drizzle honey on top (about 1 tsp, anything less and you barely taste the honey).
Crispy Honey Garlic Chicken
Photo Credit: Kendal SagerRecipe Credit: Food.com recipe modified by Kendal Sager

Ingredients:
Honey Garlic Sauce:
- 2 tablespoons olive oil
- 3 garlic cloves, minced
- 1 cup honey
- 1/4 cup soy sauce
- 1 teaspoon fresh ground black pepper
- 2 cups flour
- 2 tablespoons powdered ginger
- 1 teaspoon cayenne pepper
- salt
- 1 tablespoon fresh ground black pepper
- 2 eggs, slightly beaten
- 4 tablespoons cold water
- 10 chicken legs
- vegetable oil
Directions:
- Put about 2 inches of vegetable oil into a large flat frying pan. Turn the heat on to medium-low. Don't overheat the oil, I usually run my hand under water and shake a few drops into the frying pan at this point. When the water starts to sizzle, the oil is the right temperature. If the water just sits still, it's too cold, if the water causes the oil to pop and spatter everywhere, it's too hot. A splatter screen is very useful for this.
- While the oil is heating up, mix together the 'coating mixture'; set aside.
- In a seperate bowl, whisk together the slightly beaten eggs and cold water.
- Wash and pat the chicken legs dry.
- When the oil is up to temperature, dip the legs into the egg wash and then toss into the flour mixture to evenly coat. Place as many legs as you can into the pan. Let the legs cook for 3-5 minutes or until that side starts to brown, then turn 1/4 turn. Turn and cook until all sides are browned.
- While you're cooking the chicken legs, you can prepare the sauce: In a medium sauce pan, cook over medium heat the olive oil and garlic to slightly soften; do not let it brown. Add the honey, soya sauce and black pepper. Continue to cook over medium heat and simmer sauce for 5-10 minutes, watching carefully as it simmers because it can foam up and overflow. Remove from heat. You can also do this part in the microwave - but watch it carefully, you really only want to warm it up.
- When the legs are done cooking, place them on a plate and then liberally pour the sauce over them. I suggest serving this with a salty vegetable.
Mini Baklava
Photo Credit: Kendal SagerRecipe Credit: Idea from Giada (Cooking Channel) recipe created by Kendal Sager

The Paste:
- 1/2 cup almonds
- 1/2 cup walnuts
- 2 tablespoons sugar
- 1 1/2 teaspoons ground cinnamon
- 1/4 teaspoon ground cloves
- Pinch of salt
- 2 tablespoons melted butter
- 3 tablespoons honey
- 1/2 cup honey
- 1 tablespoon lemon juice
- About 1 stick of butter melted (you can use 1 stick minus the 2 tablespoons you needed for the paste)
- 12 sheets phyllo dough (I usually find this frozen, defrost in the fridge for 24 hours)
- 2 mini muffin tins (enough for 24 mini muffins)
- Preheat oven to 350.
- In a food processor or blender, combine all of the ingredients for the paste. Pulse until everything is blended, you can leave the nuts a little chunky for texture.
- Lay out a sheet of phyllo dough on a clean surface (a cutting board would be best) and brush it with melted butter. Layer another sheet on top of it and brush it with butter again. Do this until you have 6 sheets of phyllo dough stacked up. Cut the dough into 12 pieces (4 pieces by 3 pieces works well) and carefully push the square into a mini muffin well.
- Spoon about a tablespoon of the paste into the dough, then bring the corners of the dough into the middle and twist to seal the dessert. It doesn't need to be sealed tightly just bring the corners out of the way of the other mini baklava.
- Bake for 20 to 25 minutes or until golden brown.
- While the baklava is cooking, combine the sauce and heat it in the microwave for about 30 seconds, just enough to warm it up a little. Don't let it foam up.
- When you take the mini baklava out of the oven, let them cool for a
few minutes then place them on serving plates. Liberally drizzle the
honey lemon sauce over the baklava.
Tuesday, August 28, 2012
Second Honey Harvest
For our second honey harvest, we enlisted some happy helpers (Thanks Cliff, Emma, and Russel!) It was a good thing too, since we were harvesting 40 medium frames of honey on a weeknight. Here is happy helper, Emma, holding a full frame of honey:

Here are Russel and Emma decapping some frames:

I think this process may have convinced me to get an extractor of my own for next year, just so that I can have it when I need it. I wasn't really expecting to need to harvest a second time, so the extractor that I borrow from the Beekeepers' Guild of San Mateo County was booked every weekend. Overall we got about 7 gallons of honey, the process took pretty much all night, even with the 5 of us working on it. We also got a lot of wax from the cappings and burr comb:


Here are Russel and Emma decapping some frames:


I think this process may have convinced me to get an extractor of my own for next year, just so that I can have it when I need it. I wasn't really expecting to need to harvest a second time, so the extractor that I borrow from the Beekeepers' Guild of San Mateo County was booked every weekend. Overall we got about 7 gallons of honey, the process took pretty much all night, even with the 5 of us working on it. We also got a lot of wax from the cappings and burr comb:

Subscribe to:
Posts (Atom)